If you’d like to display a Google Map on your website, then it’s very easy to do thanks to Google’s embed code. Just follow these simple instructions.
(If you’d rather your website could get the maps from Google itself directly, then ask us about setting up the Google Maps API to work with your site.)
1. Read this whole page first before going anywhere!
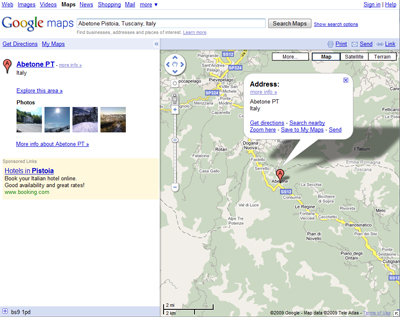
2. Visit Google Maps – http://maps.google.com (opens in a new window).
3. In the large search box along the top of the page, enter your address. Click the “Search Maps” button to the right of the search box and you’ll see where Google thinks you’re located. If you think this isn’t quite accurate, vary the address you’ve entered and search again. You may just need your postcode, or if you’re in a country where postcodes/zips cover a large area, try your street and town.

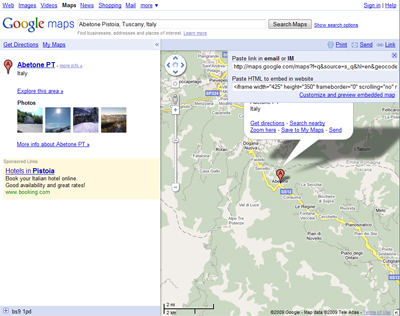
4. Once you’re happy with the location on the map, click on “Link” on the blue bar along the top of the map (it’s to the right). Then click on “Cusomize and preview embedded map”.

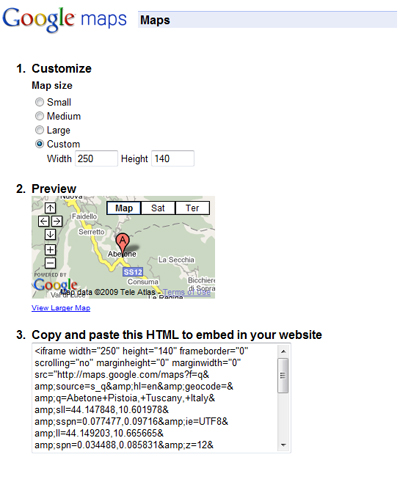
5. You’ll then get a little window come up that looks like this:

In Option 1, click on “custom” and enter the width and height that suits your site.
Option 2 is a preview of how your map is going to look on your site, so if you want, click on the preview and move your mouse to drag the map around inside the frame, to get it exactly how you want it. If you’ve got a white bubble showing with details of the place, click on the cross in the top corner of it to get rid of it (if you can’t see the cross, click and drag the map down a bit so that you can see the x).
Then just copy the text that’s in Option 3. Do this by selecting it all with your mouse, right click and select “copy”. If you’re using a mac, you have to hold down the apple key on your keyboard to achieve a “right click”.
6. Then return to your website and paste the code you copied where ever you need it. (Again, you can paste by right clicking and selecting “paste”.)
7. You’re done!


