If you’ve got a website that has rows of images, you often need to ensure the canvas size of each of these is equal before you upload it.
Whilst your website will probably have rules in place to make images a certain height or a certain width, if you want to avoid cropping and get things to line up, you’ve got to give the code suitable things to work with in the first place. If you think about it, if you upload a landscape photo and a portrait photo side by side and they each need to occupy the same width, then they’re going to be different heights, or the website is going to need to cut the top and bottom off of the portrait one to make it the same height as the landscape one.
Clients typically don’t like their images being cropped, so to avoid this and keep everything neat, you need to ensure the canvases are all equal when you upload the images.
Take this example for instance – our client BeyondTheBean have a row of their brand logos on their home page. Now, the Sweetbird logo is quite landscape – short and wide. Meanwhile ZUMA and Cosy are quite square. But when we put them on their website, we resized them all so that they look good next to each other.

You can do this sort of thing by making sure they’re all on the same size canvas. And there are a couple of different ways you can go about this in PhotoShop.
1) Start with a blank slate
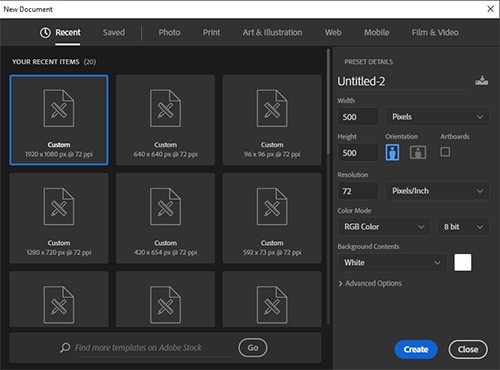
In the case of a row of logos, I’d ideally make a new canvas of the size I need the image to be. In the example below, I’m starting a new file (from File > New) and giving it a width and a height of 500px.
Then, on that new canvas, paste your logo or image into the centre of it, making sure that the image you’re pasting in doesn’t have a width or height of more than your canvas size (in this case, 500px). If it does, once it’s on the screen, simply press Crtl and T on your keyboard to get a transform line around the image, and drag it to be smaller:
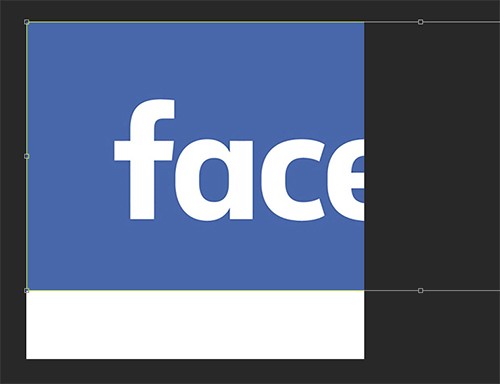
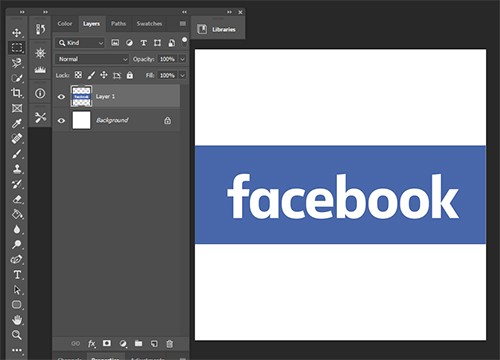
Once you’ve dragged it to a suitable size, move it with your mouse to the centre of your canvas. If you decide to colour the whole background of the canvas (here shown in white) to a different colour (so, in thios example you might want it all blue) you can double click on the background layer from your layers (shown on the left) to unlock it and then colour it however you wish.
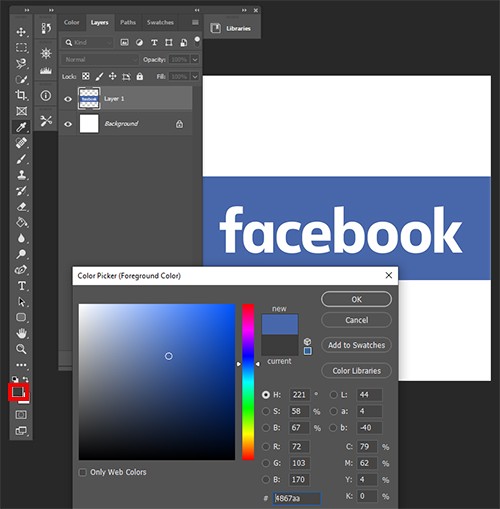
If you want to colour match, in this case, the blue you’ve already got in the image click on the top square of the 2 overlapping squares (shown with a red box around it below) and then click on the colour you want, and you’ll see the colour chart jump to that exact shade. Then click OK on the colour chart, and use the paint fill (bucket) icon to colour the background layer of your canvas.
2) Change the canvas size
Your other option is to change the canvas size. So if you have a file that’s not big enough, or rather, is an odd shape compared to the others you will have in that row, you can click on Image > Canvas Size and type in the width and height you need there. You can also click on the Anchor arrows to change where the extra space is added. You can remove space as well from a canvas – as in, make it smaller – but that will usually crop your image.
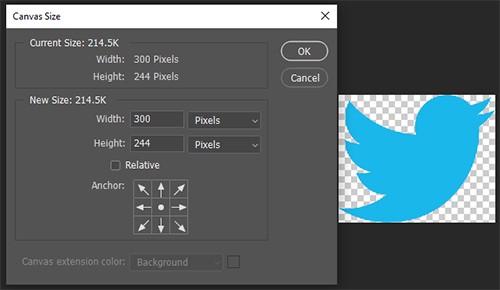
Once you’ve clicked “OK” on your new canvas size, your file will be ready to save off and upload, and you’ll know it’ll sit neatly in a row with other images of the same size!


